Showing posts with label wooden buttons. Show all posts

Tuesday, May 8, 2012

Buttons .. Buttons .. oh Glorious Buttons :)


'A picture is worth a thousand words ...'


So I need not write anything for this post ... :P

(What can I say? It already got 2000 words on it! Lol!)


Wednesday, October 26, 2011

DIY - From Trash to Treasure ep. 2


Last Sept. 19, I posted this picture of my 'On the Go' Mini Pincushion on BBC's status, entitled 'Recycle - from trash to treasure'

Quote:
'Dari rol karton bekas gulungan benang smok, sisa kain katun print dan flanel, satu kancing kayu uk. kecil dan kertas karton, hotmelt glue, sedikit dakron dan jahitan, jadilah kreasi seperti ini .. :)'

And from my last post, I promised you some quick trash to treasure tutorial, so here goes:  


Mini Pincushion Tutorial
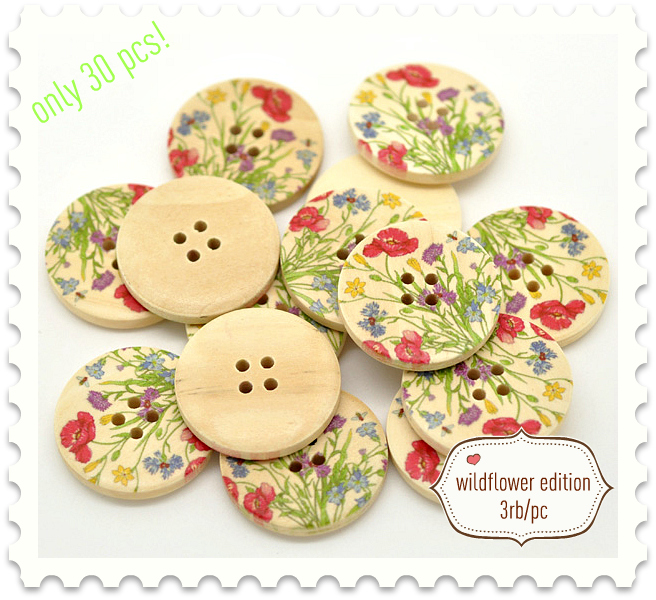
  1. Collect the materials that you have on hand: scrap cotton fabric, used cardboard tube, 2 pieces of felt scraps, leftover lace for decoration, wooden button (if available), and some polyfill (dacron) and a length of thread;
  2. Measure one of the felt to fit the bottom of the core - trim it nicely;
  3. Cut the bigger felt scrap into a rough circle, doesn't have to be perfect as you will sew up the bottom  anyway (see step 4);
  4. Sew the felt (see pic. 4) and pull the string - filling the felt with the polyfill as you go ... make sure to make it nice and round;
  5. Place the core on the wrong side of the fabric to measure up the length needed for wrapping;
  6. (I used zigzag fabric scissor on one side of the fabric, to prevent fraying) - place a double tape on one side (yep, I used double tape - or you can use hotmelt glue instead) and roll the core to a perfect wrap;
  7. (picture of a wrapped core - don't worry about the excess fabric on the sides)
  8. Line the inside of the core with hotmelt glue and tuck in the excess fabric, be careful when using your fingers to do this as the glue is very hot (duh, that's why they call it 'hotmelt glue'!), I prefer to use a stick to press down the fabrics instead.  When done, add some more hot glue on top of the tucked fabric and pop in the round felt 'ball'. Push it in and check if the glue had secured the 'ball'  perfectly - then finish up the other end just like the first;
  9. Lastly, add some hotmelt glue to the end part of the core and place the felt from step 2 (see pic. 9).
There, all you need to do now is add some embellishment as you like (I used a stretchy lace that I bought from Irmawati Sewcraft, an FB onlineshop!) plus a green wooden button to add more charm and ... VOILA!!


Not bad, eh? You can do this in a jiffy :)

And check out what our friend Mba Ichii from Goodthinks had created, for her version of the mini pincushion:

Total cuteness!!


Hope you like this post as much as I do, and don't forget ...

REUSE and RECYCLE! :)

Happy crafting y'all!


Sunday, September 18, 2011

Lazy Sunday Crafting - Bird Mobile

Happy Sunday everyone!

There's something about Sunday mornings that I can't quite pin down - is it because Sunday is a family day, where each family members can fully enjoy each other's company from sun up till bed time? Could be, well, at least it happens in my family :)

It is during this blissful time that I could sit down and browse fresh new ideas from other crafters' blogs for my craft inspiration, and today my attention got snagged on this work of art - it was a bird mobile project, an old post by Laura from Spool Sewing last May 16, 2008.

Check this out:

Bird mobile project from Spoolsewing

Detail on the birds

Use of various patterned fabric for the birds
Luckily, I had previously ordered some fabric pieces from a fellow Facebook onlineshop, Juvin Art Souvenir. They were supposed to be my 'guinea pig' for my headband project but they turned out perfectly cut for building my soft birdies.
Some of the recently bought printed cotton fabric (and buttons)
Laura's blog also include the free PDF pattern for the bird [click here].  This is for personal use only and not for selling.

for illustration purposes only
So I cut the patterns and trace it on my fabric with a fabric marker - [tip: during pattern cutting, I always cut on the sewing line, the additional seam line can be added later during fabric cutting; hence I get a precise trace from the fabric marker when I sew the pieces together. my rule: trace on the wrong side of the fabric]

For the fabric marker, I used my Giotto Decor that I bought from Cici Konde, another fellow FB olshopper who also sells her beautifully made whimsical crafts online.  I use whatever tools I have on hand so the Giotto Decor will do (and to my delight, it worked perfectly!).


Without further ado, I got to work, adding a little piece of scrap trimming and a 17mm heart button ... and VOILA!  My very own bird softie! 


[i know, i know .. I still need to work on the other birds but it's very exhilarating to get your first 'baby step' done, lol!)

Enjoy and happy crafting {while I'm on a hunt for the perfect twigs and branches!


Sunday, September 11, 2011

DIY - Mad About (Wooden) Buttons


A couple of days ago I put up 100 pcs of 18mm heart floral buttons for sale at Blessedly Blissful CraftStore, and sure enough, they got 'adopted' pretty quickly by our customers. 

But the funny thing was, most had no idea what to do with them (yet!) :) 


bigger 3mm floral wood buttons

Soooo, hopefully this post could provide some simple ideas on what to do with these little cuties, and their bigger cousins {of course! :P}. 

You could:

1.  apply it on your plushie, it sure would make a pretty accessory to your soft toy collection

before
after
{now Ellie has a heart! well, two hearts really, as another heart is placed on her other side ;) is it me or does Ellie seem to be smiling now? awwww .. how cute!} 
2. apply it on a hair clip (with the help of mr. glue gun) - you can add extra ribbons, yarn or even glue on smaller buttons on it (in the case of the bigger wooden buttons - which are also on sale at BBC).

3. add a magnet to the backside of the button - and VOILA! Your very own beautiful fridge or message board magnet(s)! Imagine if you have different sizes and kinds of these buttons decorating your fridge/board, oh wow! -- absolute eye candy!


4. put it on a rink shank (and use it as a ring) or assemble it into a necklace - awesome!

This one is for illustration purposes only

Pretty easy, right?
So, go get your stuff, have fun and happy crafting! ^^


Saturday, September 3, 2011

Happy Days! They're HERE!!

Hello World!

Ooo, it feels so good to be back ... after all the month-long fasting and big two-days filled-with-delicious food celebration of Eid, my head are filled to the brim with ideas and other stuffs to be shared .. =)

But first, I'd like to update you with THESE yummies ....

Remember my previous post about winning a cool zippy pouch from Zippie Zipper {and the winner is ...}?  Well, it's here! ^O^

Last August 25, 2011

Package no. 1
The first package to open {of course!}

found this circle of zipper ...


halfway there ... starting to look like a pouch ;)

aaand ... voila!  what a treasure!! {love}


What's more, my best friend from Apuu Handmadeshop dropped by to deliver this cute custom-order wristlet pouch for me --

see why I ordered this pouch? all my 4 kids are there! ^_^


Let's continue on to package no. 2 & 3 ...
These came from Shanghai!  Must be the buttons from PO-August
for Blessedly Blissful CraftStore! ^O^

OOO .. the big buttons are here!!! Aren't they GORGEOUS??


Look at the cutesy mini buttons, the ladies must be thrilled to see this :)
Oh wow, the charm dangles are here too! Yay!!


Marvelous! They look exactly just like in this pic!!


What a surprise, package no. 4 and 5 arrived an hour later!

OMG! These must be the hijamon pins from Pepo Loco & cookies from Dapoer d'Pratt!


Woot .. woot! I so dig these four hijamon pins, they look just like MY 4 KIDS, lol .. 
Awww .. bless her soul, Ibu Prat just sent me yummy cheese sticks, choco chips and cornflakes!! her choco chips cookies just melt in your mouth, always a favorite!
Oh wow, what a day! It was just like having a visit from Santa .. God bless you Mr. postman/courierman/um .. whatever! :))  and I think that's all for now.  {actually I have two other deliveries but I'll just save it for my next post ;)}

Promise to catch up later! :)


Sunday, August 14, 2011

Buttons, buttons, buttonsss ep. 2 ... :P

Yay!

Out of 250 pcs I ordered last time, I could still saved 12 pcs of the heart-shaped buttons for myself ... pheww, that was too close, people ... :P

But I owed a big thank you to all BBC's wonderful customers who had booked the buttons ahead of their arrivals. Hopefully those cuties will make your handmade creations even prettier than pretty ... amen! 


And for those who had missed out August pre-order, here's a sneak peek of more cuties for September ... don't tell anyone! * hihihi *

Just click on the pic for a larger image.


Will be ready:
A - 30 pcs     B - 30 pcs
C - 50 pcs     D - 30 pcs
E - 50 pcs     F - 30 pcs

Happy crafting! ^^


Thursday, August 11, 2011

Buttons, buttons, buttonsss ... :P

Sometimes it's very frustrating for me if I can't get the props I need for my craft - such as these cutesy buttons ...

Really! Aren't they the cutest buttons on earth?!

So I hunted them down and ordered a good number for each type - I can't pick which one is my favorite!  And sure enough, these little darlings were a hot sell in my 'Blessedly Blissful CraftStore'.

They're actually embellishment for scrapbooking but for the crafty mind of a crafty crafter (wow, that's a mouthful, lol!), there are hundreds of ways to use these buttons in her creations ...

 17mm floral heart wooden buttons

15mm round floral wooden buttons

25mm round floral wooden buttons


*need to remember to keep some for myself, lol ...*

I'll post more on my creations using these pretties, so stay tuned! ;)